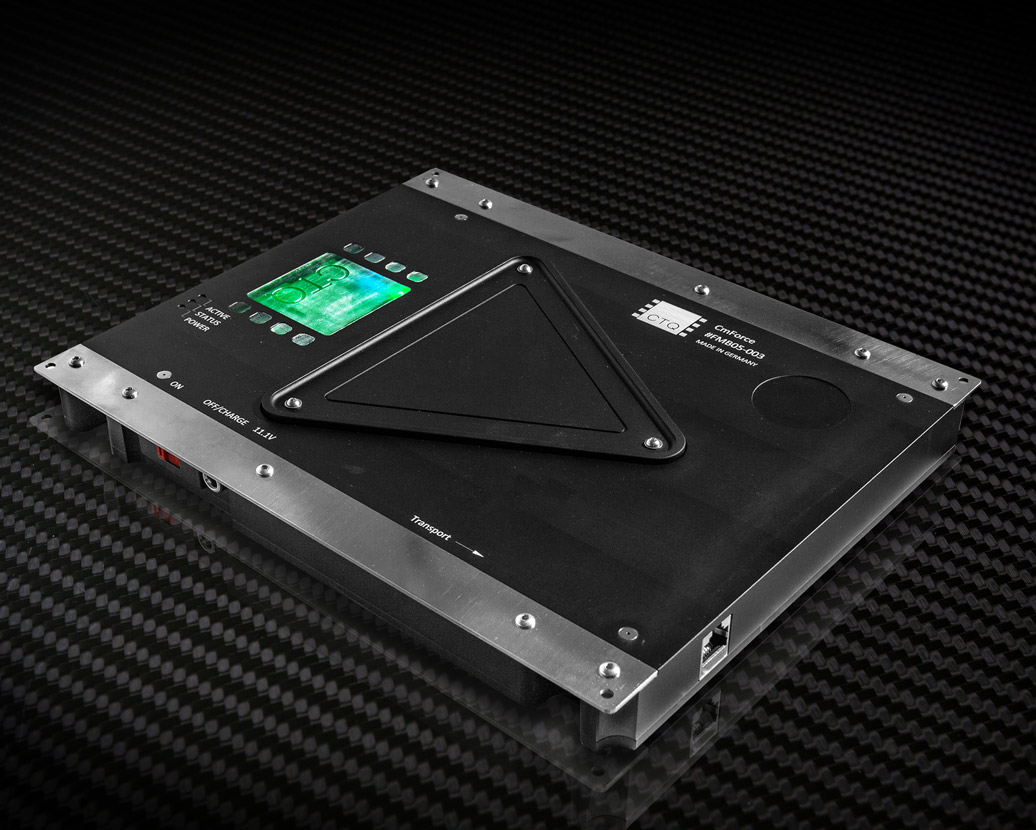
Measurement of placement forces directly in the production environment – manufacturer-independent, in real processes.
Objectively record forces – protect components, optimize processes
CmForce is tailored to investigate the forces occurring during placement. Instead of a single-point sensor, the system uses a placement surface: Real components can be placed in the process as in production – with a high sample size and thus high significance of the results. After just one measurement, the force and energy input of each individual nozzle is known.
This enables targeted maintenance and optimization, prevents component damage, supports product launches and investment decisions, and provides reliable evidence in audits. Continuously developed from thousands of measurements in the CeTaQ service.
Quickly find errors, optimize processes, master audits
Make changes visible through process optimization
Root cause analysis
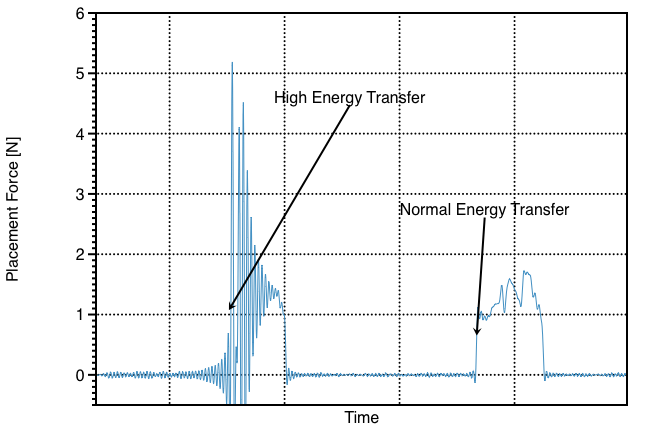
High impact energy can damage components. Knowledge of the force-time profile of a placement operation is important for risk analysis.
Continuous Improvement Process
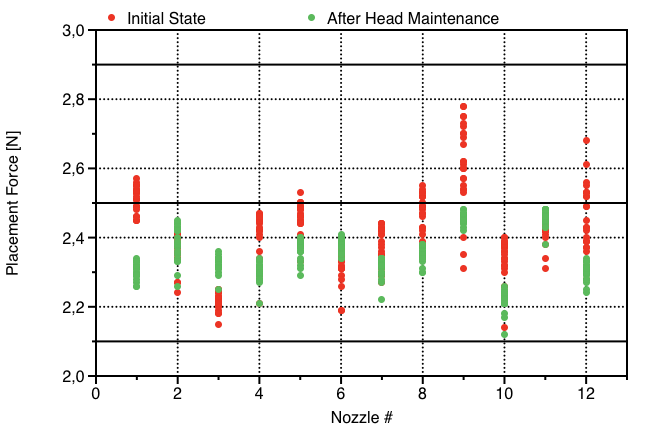
The results show differences before and after head maintenance. After maintenance (green), the standard deviation and mean values have improved.
Placement head analysis
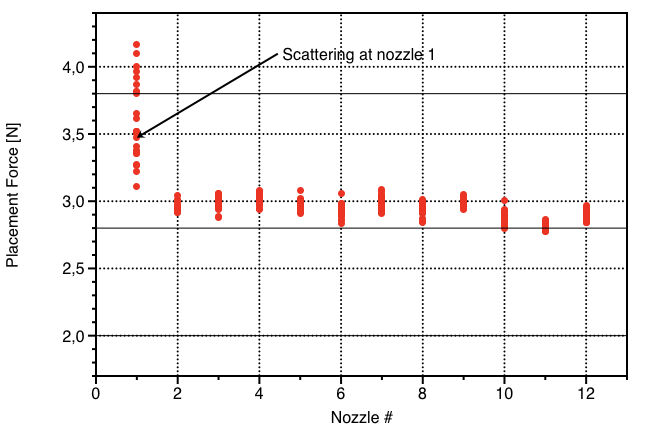
This example shows a clear deviation of Nozzle 1. This insight enables targeted troubleshooting.
Sporadic component damage
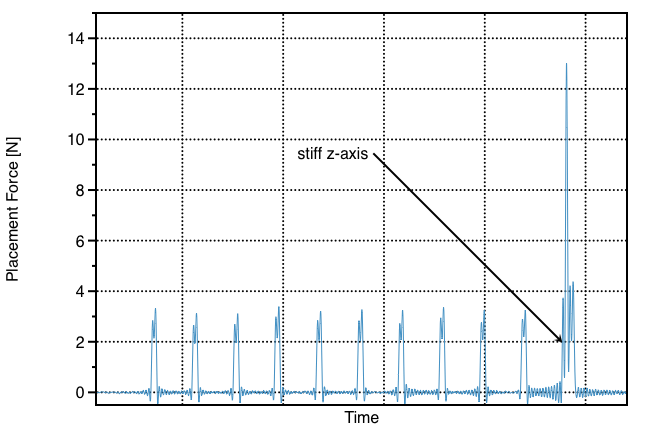
Defects in the placement head can sporadically cause high placement forces, which can lead to component damage.
Technical details easily explained
Detection of mechanical issues & maintenance, machine acceptance, early detection of weak points, audit evidence, investment decisions
Even with just one measurement, the placement force of each individual nozzle is known. This allows for targeted maintenance, repair, or optimization, and also prevents damage to sensitive components.
Instead of a single-point measurement, CmForce measures dynamic forces across a placement surface. This allows the machine to operate precisely as in the real process, and all typical influences are captured during the measurement.
The software enables:
-
Live display of the force-time curve
-
Detailed peak analysis: maximum force, impulse (dF/dt) → energy input, duration, head/nozzle evaluation, statistical parameters
-
One-click HTML protocol
-
Capability indices
-
Data export to CmCStat Expert
Yes – CmForce enables placement with real components from production in order to achieve measurement results under production-like conditions.
Yes – the sensor board is processed in the assembly system like a normal circuit board and therefore works in any pick and place machine.
Currently, the two versions FMB-05 Standard and FMB-05 High Force are available.
- Standard: Measuring range 0.1-20 N, measuring uncertainty ± 0.03 N
- High Force: Measuring range 0.1-100 N, measuring uncertainty ± 0.02 N + ± 0.01 N × nominal value
-
FMB‑03 (wired system)
-
Measuring range: 0.1 – 20 N
-
Measurement uncertainty: ± 0.03 N cetaq.com+5cetaq.com+5cetaq.com+5
-
-
FMB‑05 (Standard / High-Force, Wireless)
-
Measuring range standard: 0.1 – 20 N
-
Measuring range high-force: 0.1 – 100 N
-
Measurement uncertainty standard: ± 0.03 N
-
Measurement uncertainty high-force: ± 0.02 N + ± 0.01 N × nominal value
-
The sensor board has a measuring surface of approximately 5,000 mm². This area is sufficiently large to place real components under near-production conditions and obtain statistically relevant samples.

