Your solution for objective machine capability analyses
Position measuring devices optimized for the specific characteristics of SMT production
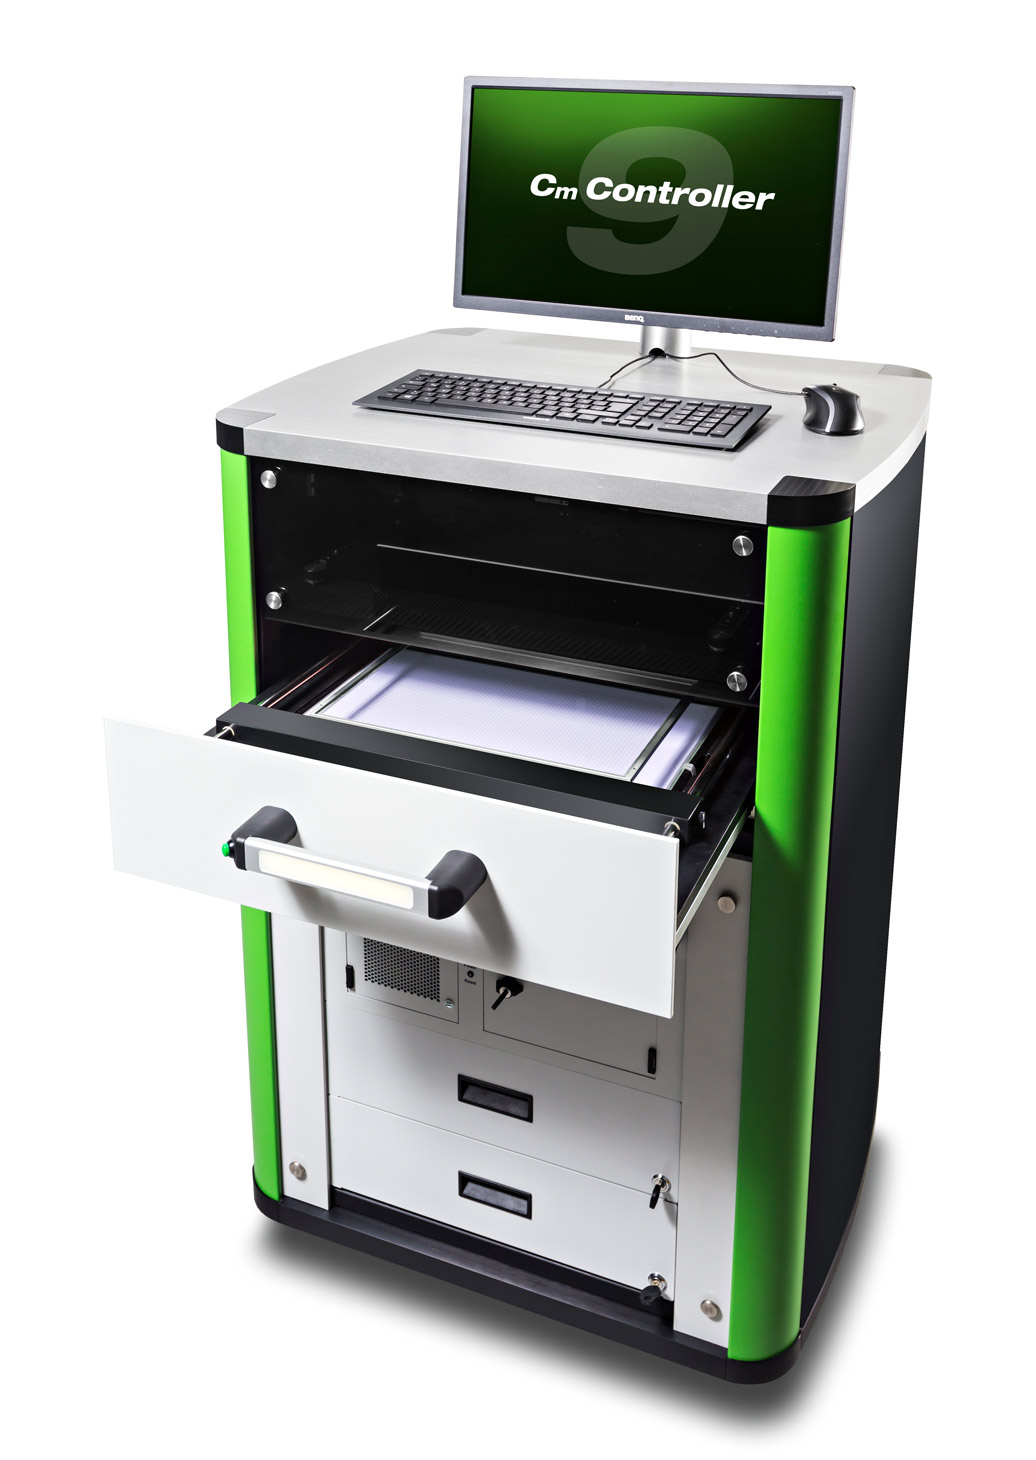
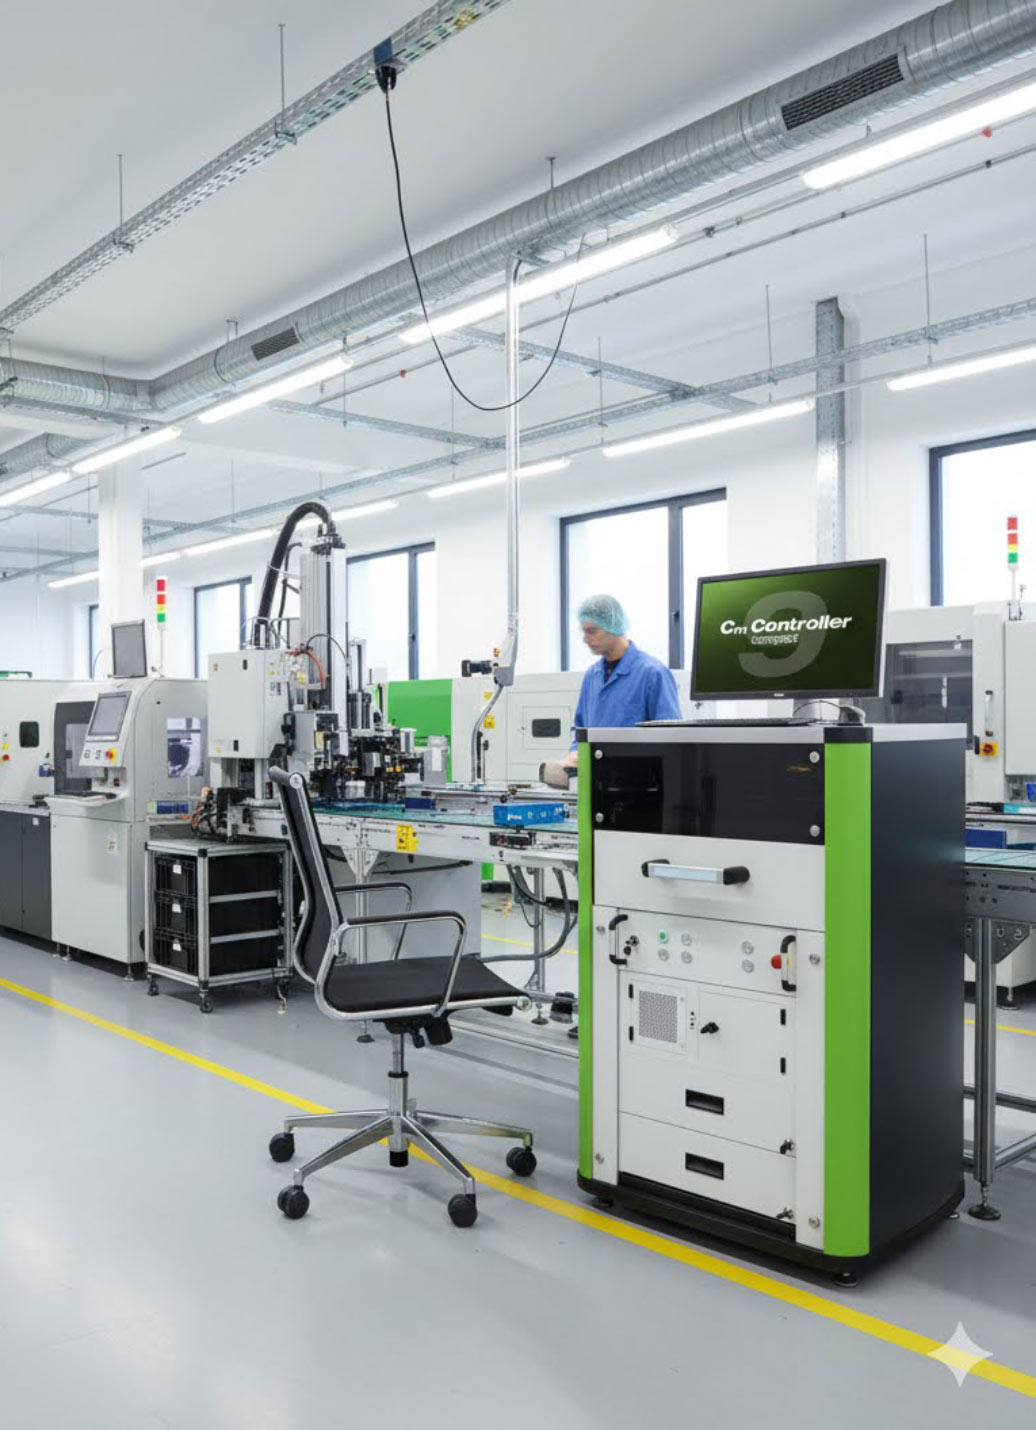
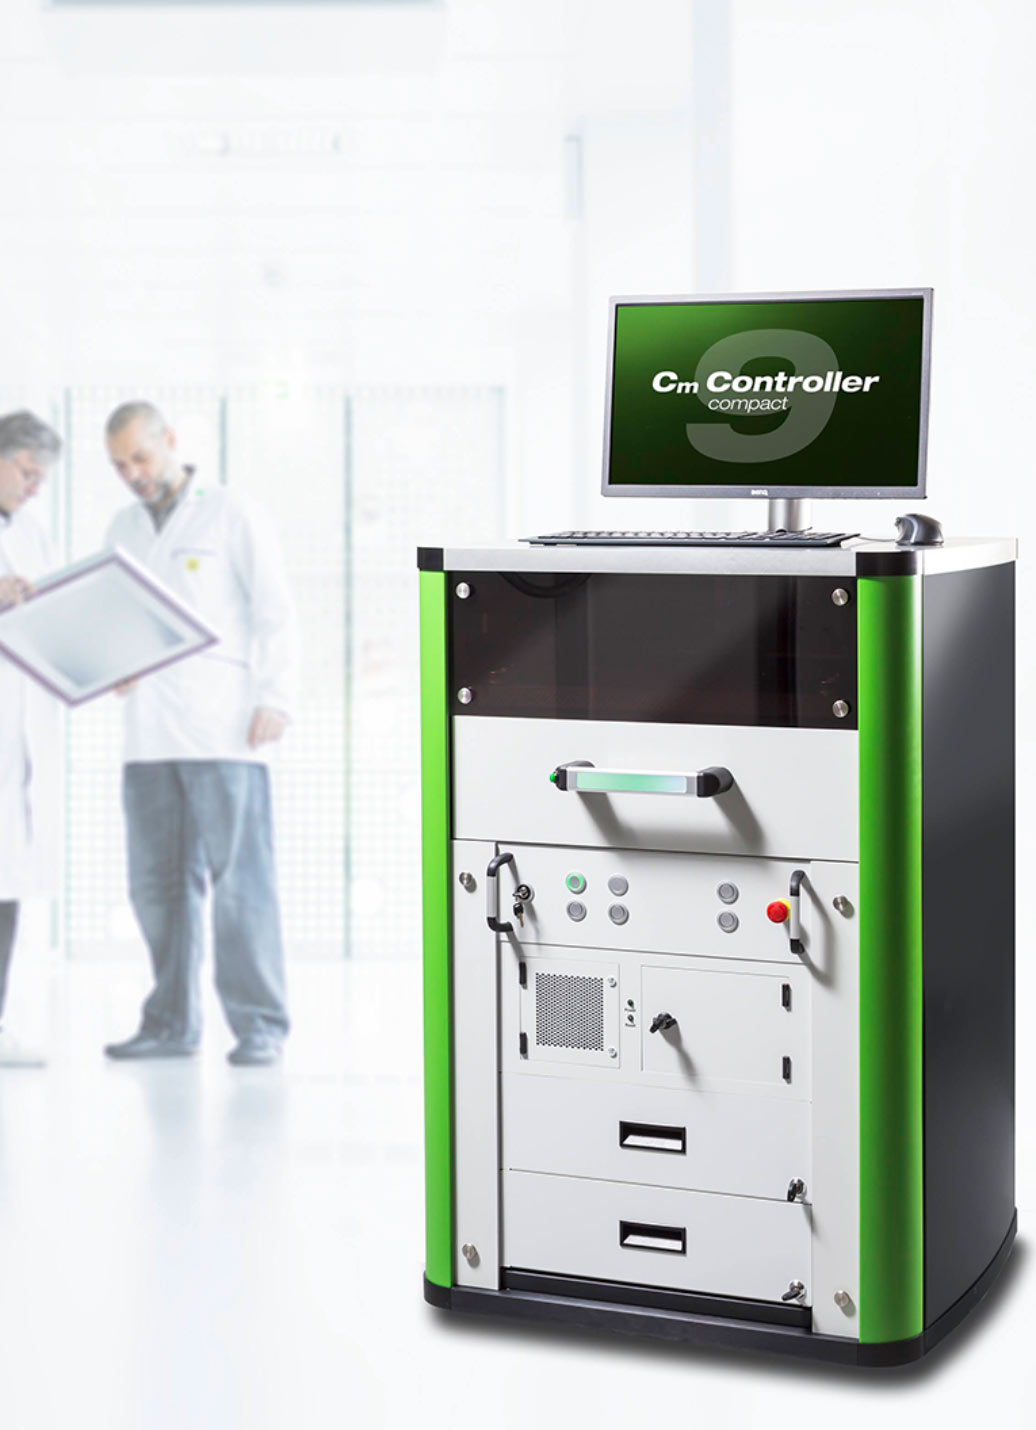
The CmController 9 is a high-precision position measuring system for investigating machine capabilities – specially developed for the requirements of SMT systems. It measures the accuracy of the systems involved in the production process and helps to identify sources of error at an early stage. An air-conditioned measuring room is not required – reliable measurement results are possible directly in production.
The system is based on 30 years of experience in research and development. It combines modern technology with practical design. Feedback from our measurement service is continuously incorporated into further development. The CmController 9 is the result of thousands of successful measurements – reliable, precise and directly tailored to the needs of SMT production.
Precision, experience and decision-making reliability
Specially developed for SMT systems
Precisely measures machine and process accuracy directly in production.
Reliable basis for decision-making
Supports error analysis, technology introduction and audit evidence.
30 years of experience integrated
Continuously optimized through practical use and feedback from thousands of measurements.
Without an expensive measuring room or complex coordinate measuring technology
From measured values to measures
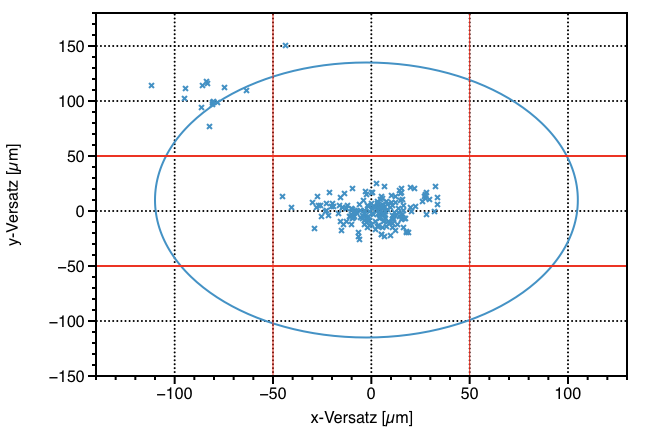
Deviations in the initial state
The diagram shows the results of an investigation in the initial state. The measured system does not meet the required specifications.
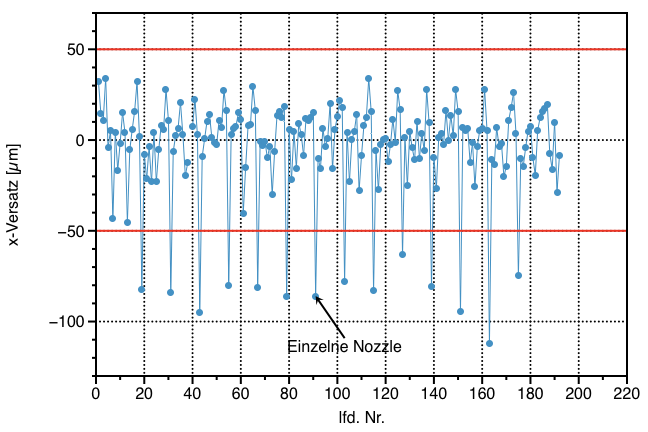
Detailed error analysis
The analysis options of the CmController software go far beyond the usual calculation of capability values and the determination of “passed” or “failed.” The focus is on finding the cause. The example shows an offset of a single nozzle.
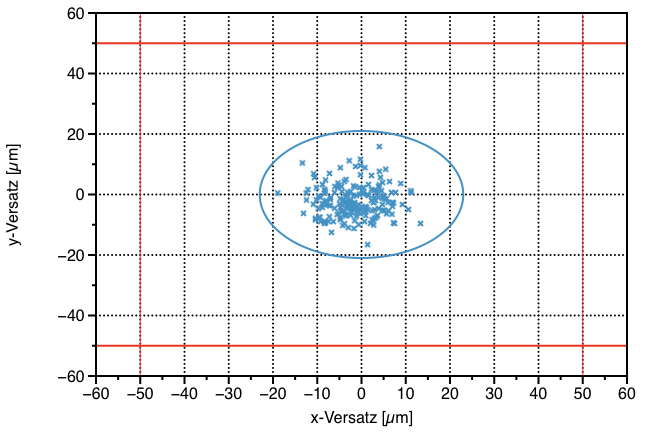
Troubleshooting
If you know the causes of a poor result, you can take targeted measures to improve it. The example shows the final state of the system after eliminating the nozzle offset.
Why precise measurements are the key to process optimization
Measurement directly in production
The CmController was specially developed for the requirements of SMT production. It measures the positioning accuracy of your production machines directly in production.
Powerful algorithms ensure low measurement uncertainty and independence from environmental conditions.
This provides a well-founded database for evaluating and optimizing your manufacturing processes. This allows potential sources of error to be identified before they affect product quality – without the need for expensive measuring rooms and complex coordinate measuring technology.
CmCStat Software — In-depth analysis instead of superficial testing
Each CmController is supplied with the CmCStat software. It is optimized for the requirements of surface mounting and makes it possible to analyze and optimize the accuracy behavior of manufacturing processes and to identify the causes of errors at an early stage.
With CmCStat, users receive an integrated tool that covers the entire workflow from planning to archiving. This includes:
Technical details easily explained
- Dimensions (LxWxH): approx. 746 x 675 x 1510 mm
- Working height: approx. 1150 mm
- Weight: approx. 185 kg
- Working area: approx. 340 x 300 x 5 mm
- Measurement uncertainty U: 2 µm
The measurement speed largely depends on the inspection layout. Typically, a measurement takes less than 5 minutes.
| Measurement Speed CmController 9 | ||||
| Test Plan | Procedure | Number of Components | Image Measurement Points | Measurement Duration [min:sec] |
| TQFP100 | Quadruple Measurement | 12 | 1 | <1:45 |
| Chip Cluster | Quadruple Measurement (Wide Field of View) | 128 | 16 | <0:45 |
In practice, this means that a measurement typically takes less than 5 min.
The measurement accuracy is verified on a calibrated measuring plate according to IPC 9850. The system meets the requirements specified therein for measuring equipment capability and reproducibility for the specified process limits.
| Measuring task | Verifiable process limits | |
| x/y [µm] | theta [°] | |
| TQFP100 | 10 | 0.07 |
| 0603 Chip | 20 | 1.00 |
| SOIC16 | 25 | 3.00 |
The CmController 9 can be used to measure the positioning accuracy of the following types of systems:
- SMT laser labeling systems
- SMT stencil printers
- SMT dispensers
- SMT pick and place machines
- SMT depaneling systems
The measurement data helps to detect deviations early and to analyze causes in a targeted manner. This enables processes to be stabilized and quality losses to be avoided.
The CmController 9 measures x, y, and potentially theta positions of components, deposits, laser markings, etc., applied to glass measurement plates. The CmCStat6 software also enables the analysis of measured values such as placement or squeegee force, volume, height, area, and temperatures. The acquisition of these measured values requires additional measuring devices.
In contrast to stationary measurement systems, the CmController enables fast and flexible inspections directly on the equipment being measured. This reduces downtime and increases process reliability.
The CmController can be used directly in production as well as in the laboratory. An air-conditioned measuring room is not necessary.
CmCStat6.0 Expert handles the planning, execution, and evaluation of measurements. It supports, among other things, test plans for pick-and-place machines, dispensers, printers, laser labelers, depaneling machines – including correction simulation, trend analysis, capability indices, and export functions (CSV, PDF, DFQ).

