Table of Contents
Why is the SMT Process Special?
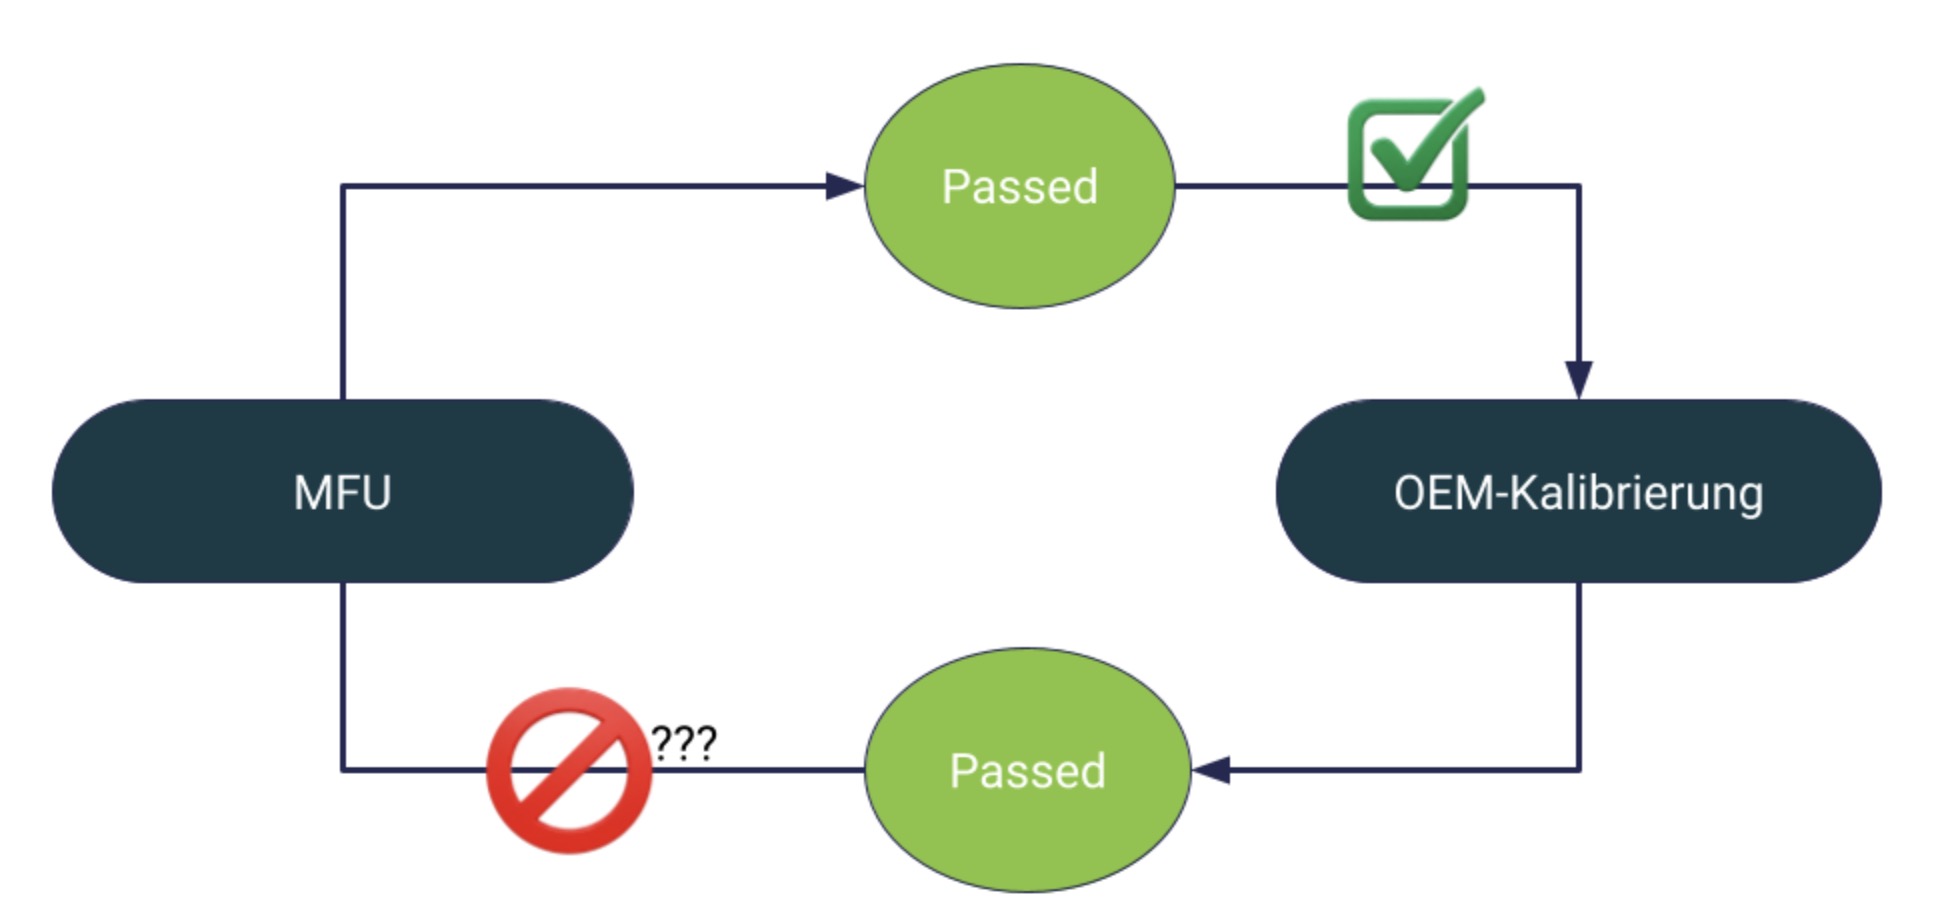
OEM calibration and Machine Capability Analysis (MCA) are fundamentally different processes with different objectives
Confusing them is a common and costly mistake. OEM calibration is an adjustment or correction. A true MCA is a statistical evaluation of performance. Here are the key arguments why OEM calibration does not meet the requirements of an MCA:
Calibration is an Adjustment, not a Statistical Measurement
The main objective of an OEM calibration is to reset the machine’s internal coordinate system to the factory-defined “zero” position.
Calibration: The technician performs a routine using the machine’s internal cameras and reference points to adjust its own geometry. This answers the question: “Are all machine components (heads, cameras, nozzles) aligned to their internal “zero” point?”
MCA: An MCA is a statistical investigation that measures the deviation (spread) of machine performance over a series of cycles. It answers the question: “Now that the machine is ‘set,’ how much does its positioning vary from one cycle to the next?”
A machine can be perfectly calibrated (perfectly “set”) and still exhibit high deviations. And with the right analysis tools, an MCA allows for more than just a good or bad statement. Rather, it helps to develop a better understanding of the interaction of different influences on positioning accuracy and to derive optimization measures before they become visible in the process.
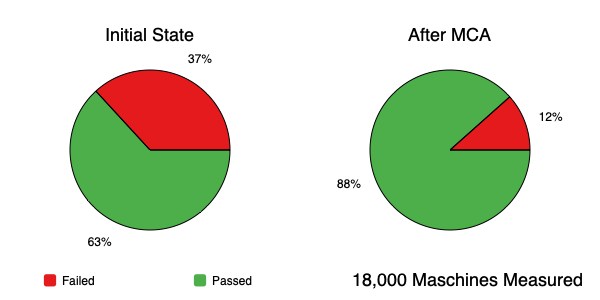
Experience from measuring more than 18,000 systems shows that after a successful OEM calibration, approximately 37% of the analyzed systems do not meet their specifications. And that insights gained from an MCA can be used to derive measures to significantly improve accuracy.
Internal Verification vs. Independent External Verification
During an OEM calibration, the machine relies on its own internal systems to verify itself.
Calibration: The camera mounted on the machine head captures a stationary reference mark, e.g., on the machine frame, and adjusts its internal offsets. This is like the machine “grading its own homework.” It cannot detect errors in the systems it uses for verification (e.g., if the calibration camera has an error).
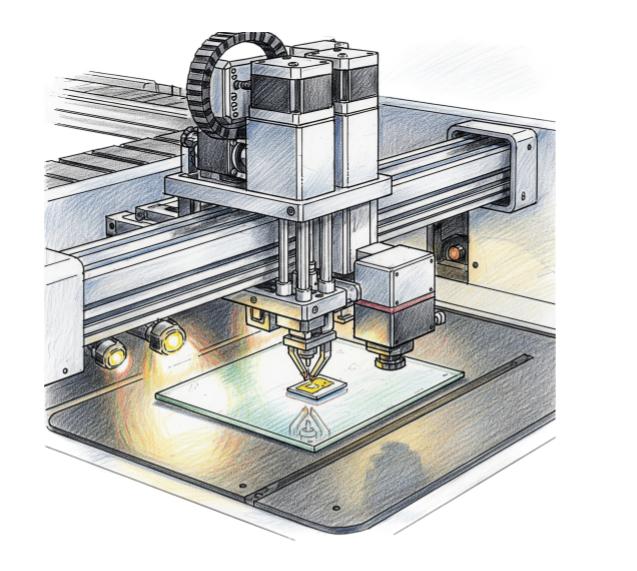
MCA: A true MCA uses a traceable, independent, and high-precision external measurement system to measure the final result. This external “tape measure” is many times more accurate than the machine under test and provides an objective, external verification of the machine’s actual performance.
Static Parameters vs. Dynamic Process Performance
Calibration routines typically measure static parameters in isolation. An MCA measures the dynamic performance of the entire process.
Calibration: During calibration, for example, the X-Y position of a nozzle, the camera angle, or the zero position of the axes are checked. These checks are often performed individually in a slow, deliberate maintenance mode.
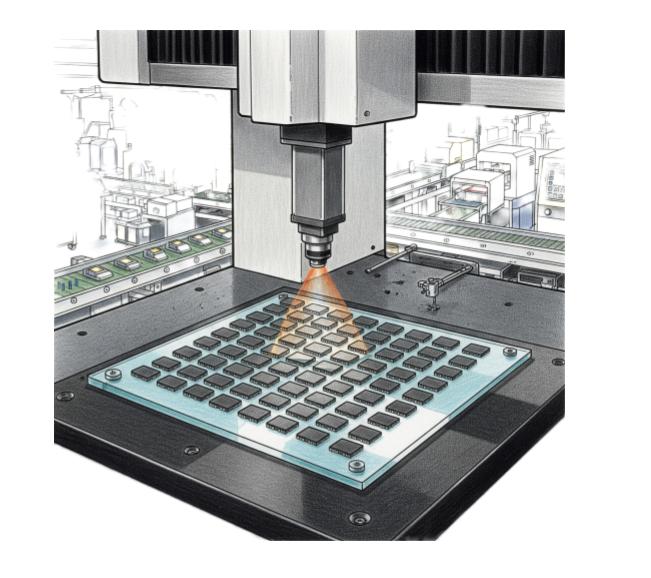
MCA: As mentioned earlier, an MCA involves the machine performing its actual task – picking up and placing a dummy component on a glass plate – at operating speed. This captures all influences that are overlooked during calibration:
- Vibrations due to acceleration and deceleration of the gantry.
- Processing time and alignment deviations of the vision system.
- Slight variations in vacuum and component pickup.
- The combination of all these small errors into a final positional error.
“Meets Manufacturer Specifications” vs. “is Capable”
The two procedures answer entirely different questions.
Calibration ensures that the machine meets its own internal design specifications (e.g., “The gantry is positioned within ±20 µm of its target coordinate”).
The MCA determines whether the machine is capable of maintaining the product’s tolerance (e.g., “Can this machine place a 0402 component with a within a tolerance window of ±50 µm?”).
A machine can be perfectly calibrated to its own (possibly loose) specifications, but still be unable to meet the tolerances required for the product.
In summary, a system that passes the MCA will generally also be rated well in OEM calibration. However, the converse is not true: a good OEM calibration does not guarantee passing the MCA. A good calibration is a necessary, but not sufficient, criterion for a system to actually achieve the required specification.
Measuring Machine Parameters is not an MCA
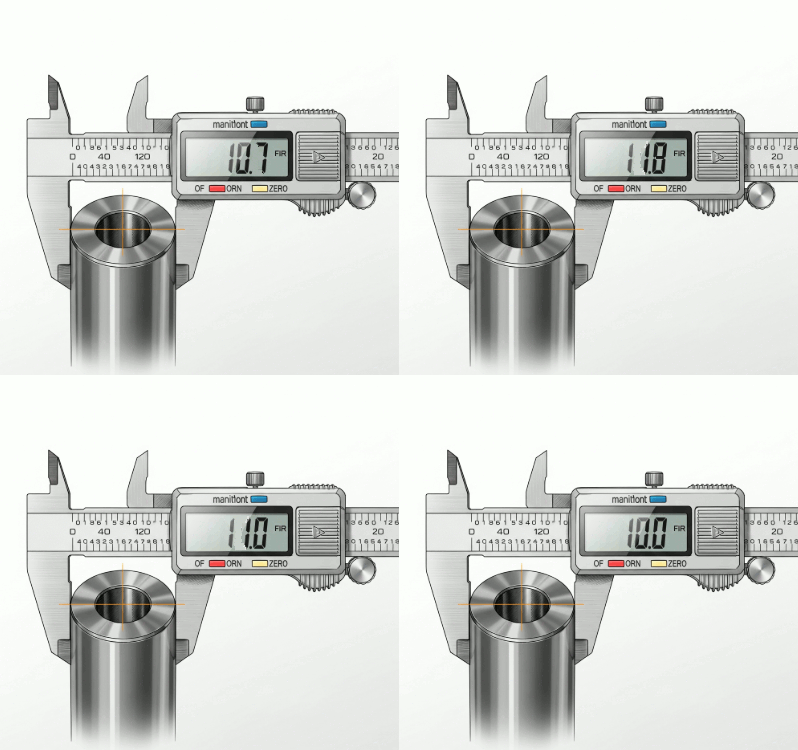
Evaluating the accuracy of a positioning system by repeatedly driving against a dial gauge is a common method for system verification. However, it is fundamentally incorrect to equate this with machine capability ( , ).

The core problem in evaluating process capability using internal measurements, such as the positioning accuracy and repeatability of a gantry, lies in a fundamental conceptual flaw. Such methods measure internal machine parameters, but not actual process performance. In the context of SMT, the actual performance would be the final placement accuracy and quality of a component on a substrate. However, machine performance is not defined by isolated aspects of internal mechanics, but always by the measurable characteristics of the end product.
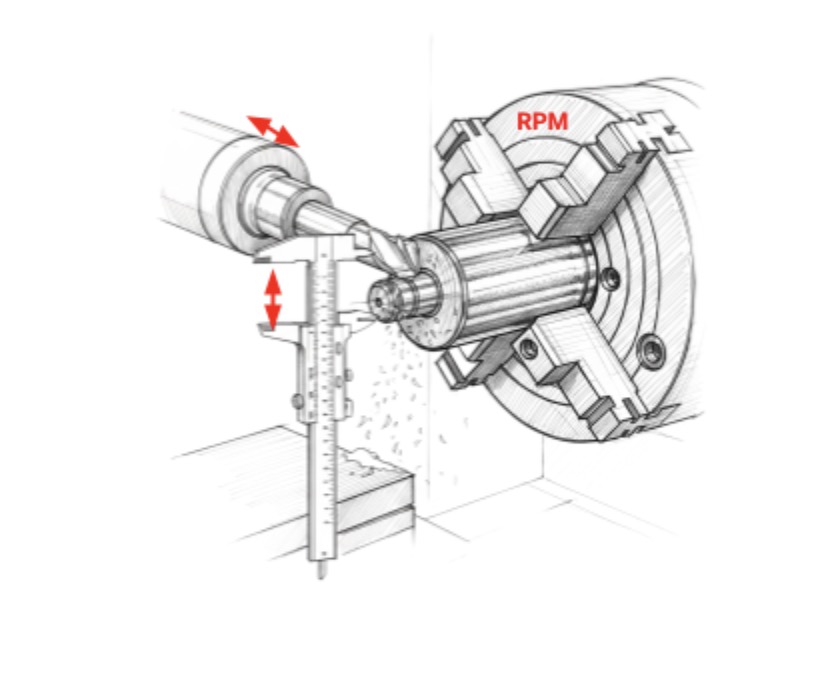
Consider the following analogy: Assessing the quality of a machined piston solely by measuring the spindle speed or the feed rate of the cutting tool would be misleading. Even if these parameters are perfectly set in the laboratory, this internal precision does not guarantee a perfectly machined piston. Numerous other factors – including tool wear, material consistency, coolant supply, machine vibrations, and operator skills – significantly influence the quality of the end product. Therefore, considering only process parameters instead of checking the final diameter and surface finish of the piston would provide an incomplete picture.
For SMT, this means analogously: even an optimally adjusted axis system does not guarantee perfect component placement. The “5M” problem reveals the fundamental shortcomings of the dial gauge method. The 5M method is a systematic framework for investigating all potential causes of a problem or deviations within a process. The 5Ms stand for: Man, Machine, Material, Method, and Environment.
Let’s take a closer look at the individual influences:
- Machine: The dial gauge test essentially evaluates a slow, static, and often linear movement of the gantry. This static measurement does not capture the dynamic effects that occur during SMT placement operations at all. It ignores:
- Acceleration and deceleration: The forces and vibrations generated during rapid starts and stops that can affect placement accuracy.
- Vibrations and resonance: The dynamic vibrations that occur throughout the pick-and-place cycle, originating from motors, belts, and the entire machine structure.
- Vision system performance: The vision system, which is crucial for component alignment and fiducial mark recognition, is completely bypassed. Its accuracy, repeatability, and speed are critical for placement performance but are not measured.
- Nozzle performance: The vacuum or mechanical gripping force of the nozzles, their concentricity, and their interaction with various component types are not evaluated.
- Material: This is arguably the most obvious weakness of the dial gauge method. The test involves no interaction whatsoever with a component or a printed circuit board (PCB). Consequently, it cannot account for critical variables that directly impact placement accuracy:
- Component-nozzle interaction: The precise behavior of the component when held by the nozzle, including possible small tilts, shifts, or rotational errors during transport.
- Component placement dynamics: The critical final phase where the component is placed into the solder paste. Factors such as paste volume, tackiness, wetting properties of the component, and the “embedding” into the paste all play a role, influencing final placement and potentially leading to deviations.
- Component tolerances: Slight deviations in component dimensions, lead shapes, coplanarity, and even weight distribution.
- Method: The complete placement process, which includes picking components from a feeder, subsequent visual alignment, movement to the board, and final placement, is entirely bypassed. This means that the synergistic interplay of these phases is not considered. Each step in this sequence can introduce its own variability.
Why is a Classical Approach Insufficient?
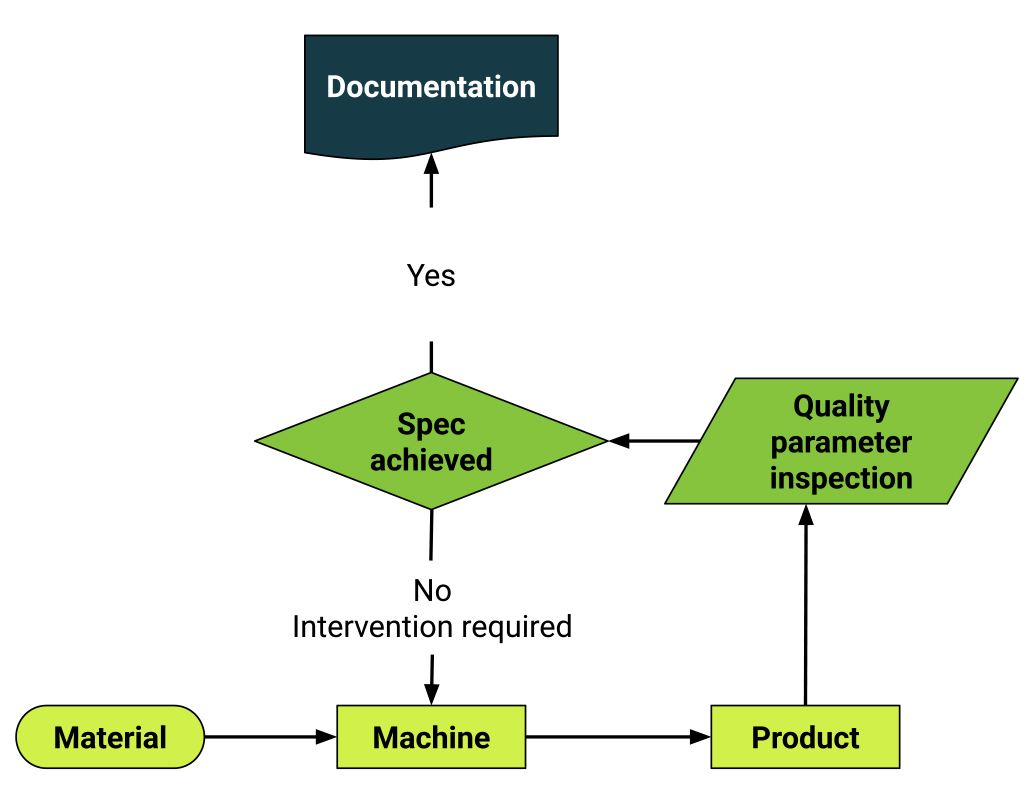
SMT manufacturing is a complex chain process where the effects of individual steps overlap. Measuring the final component position mixes all preceding variables, which significantly complicates precise root cause analysis.
The correct approach is to decouple the processes. Instead of a single “black-box” measurement at the end, all process steps are evaluated through separate capability analyses. This allows for quantifying and assessing the performance of each machine in isolation.
The Flaw in the “End-of-Line” Approach: Why Measuring the Final Solder Joint is Not a Solution
As mentioned earlier, measuring the final position of the soldered component presents significant challenges for two reasons. While this approach appears intuitive, it obscures crucial process information and compromises the reliability of subsequent analyses.
Inadequate Measurement System Capability:
A prerequisite for any robust statistical analysis or process control is the ability to obtain precise and repeatable measurements. Unfortunately, this capability is significantly compromised when attempting to measure the position of a component after the soldering process. The nature of the finished solder joint creates a challenging environment for accurate measurement technology:
- Obscured Pad Edges: When solidifying, the molten solder typically encloses and obscures the precise edges of the solder pads on the printed circuit board (PCB). These pad edges are the actual reference points for determining the intended component placement. Since these critical features are obscured, it becomes extremely difficult to establish a consistent and accurate reference point for measurement.
- Inaccurate Component Leads: The leads of surface-mount components are often not manufactured with tight tolerances. However, this is required to serve as reliable reference points for positional measurements.
- Insufficient Measurement Uncertainty: Typically, data from AOI/AXI at the end of the line is used to determine the position of components on the PCB. In addition to the aforementioned problem of difficult image acquisition conditions, the measurement uncertainty of these devices is on the same level as the positioning accuracy of the printing and placement systems.
- Analogy with a Faulty Tape Measure: Imagine trying to cut a piece of wood precisely. If the tape measure you use for marking is difficult to read or has an inaccurate scale, you cannot objectively assess the quality of your cut. Similarly, if a powerful measurement system is lacking, it is impossible to objectively evaluate the accuracy of the SMT process.
Overlapping of Individual Process Steps
The final position of a soldered component is not a single event, but the cumulative result of a series of different process steps. A single measurement at the end of the line aggregates all these individual contributions, creating a complex and “confounding” variable. This makes root cause analysis extremely difficult, if not impossible.

The influences contributing to the final component position can be divided into three main phases, each bringing its own variability:
- Solder Paste Printing Variation: The first critical step is to apply solder paste to the PCB pads. The accuracy and consistency of this process are of utmost importance. Variations can arise from factors such as stencil alignment, squeegee pressure, paste viscosity, and environmental conditions. If the solder paste is printed with a positional deviation or an inconsistent volume, this inevitably influences subsequent placement and the final position.
- Component Placement Variation: After paste application, the placement machine positions the component on its designated pad. While modern placement machines are highly precise, they are not infallible. Variability can arise from axis accuracy, nozzle wear, vision system calibration, and mechanical tolerances. Even a slightly off-center placed component contributes to the overall positional error.
- Soldering Deviation: During the reflow process, the surface tension of the molten solder exerts forces on the component. This phenomenon, known as “self-alignment,” can influence the component’s position relative to the solder pads. However, the extent and direction of self-alignment are affected by numerous factors, including pad design, solder volume, component geometry, thermal profiles, and, of course, slight deviations in initial placement. The acting forces can correct an initial misplacement or, conversely, amplify it.
When measurements are taken on the finished PCB at the end, only the superposition of all process steps is seen; these are effectively added:
Final Position = Printer Deviation + Placement Deviation + Soldering Deviation
This equation illustrates the core problem: If you detect a shifted component at the end of the production line, you know there is a problem, but you do not learn where the problem originated. Was the solder paste printed incorrectly? Was the component inaccurately placed by the machine? Or did unexpected forces during reflow cause the shift? Without the ability to isolate and quantify the contribution of each individual stage, effective root cause analysis and targeted process improvements become incredibly difficult, similar to trying to solve an equation with multiple variables with only one data point. This “black-box” approach significantly limits the possibilities for process optimization.
The Solution: A Decoupled, Step-by-Step Analysis of Individual Process Steps
To achieve truly effective and actionable statistical process monitoring in electronics manufacturing, a fundamental change in our analytical approach is required. Instead of viewing the entire production line as a black box, we must isolate and carefully analyze the results of each individual critical process step. This decoupled, step-by-step analysis provides clean and unambiguous data essential for implementing process improvements.

Solder Paste Printer Accuracy: Precision as a Foundation
The printing process is the first step in manufacturing surface-mount assemblies, and its accuracy has a decisive influence on subsequent work steps and the reliability of the end product. Similar to assessing placement accuracy, it is also necessary here to eliminate the influences of real PCBs and to use suitable external measurement systems with appropriate measurement accuracy.
- Material Used:
- Glass Measurement Plate: Instead of a PCB, a high-precision glass plate with precisely etched fiducial marks is used. This eliminates all substrate deviations.
- Stencil: A high-quality stencil specifically manufactured for the test is used, with apertures corresponding to the test layout on the glass plate.
- The Process: The printer performs a series of printing cycles. This can be done with or without transferring printing material onto the glass plate.
- The Measurement:
- Measurement with Printed Deposits: The position of the deposits printed on the glass plate is determined with a suitable measurement system. And the entire sequence is repeated multiple times.
- Measuring print accuracy with CeTaQ’s CmPrint: A special measurement system is installed on the print table of the system under investigation. This automatically measures the deviation between the glass measurement plate and the stencil during the print cycle, without any influence from the printing medium.
This procedure is indispensable in SMT manufacturing, as it separates the actual printer accuracy from process noise.
Process Control vs. Process Capability – The Role of SPI in the Process
Solder Paste Inspection (SPI) systems are indispensable tools for real-time process monitoring in electronics manufacturing. Their greatest strength lies in their ability to perform fast and repeatable measurements, making them particularly well-suited for detecting changes and gross errors in production. They answer questions such as:
- “Has the paste volume suddenly dropped?”
- “Is there a bridge between two pads?”
- “Is it time to clean the stencil?”
For this purpose, absolute accuracy is less important than repeatability. The goal is to detect deviations from a defined baseline, not to certify the ultimate accuracy of the printer.
An SPI is thus extraordinarily powerful for process control but shows a significant weakness when it comes to evaluating a printer’s machine capability. The biggest challenge is that the uncertainty of the measuring system (SPI) is large in relation to the accuracy of modern solder paste printers. In such scenarios, the measurement results for capability assessment can become misleading or even meaningless.
Placement Accuracy of Pick-and-Place Machines: Core of Assembly Manufacturing
The pick-and-place process is arguably the most critical step in achieving the required positional accuracy of components. Given the ever-shrinking components and increasing density on PCBs, even the smallest placement errors can lead to short circuits, open circuits, or reduced joint strength. To truly understand the placement accuracy of pick-and-place machines, a highly specialized, controlled methodology is essential.
- Materials Used: The industry standard for a robust Machine Capability Study (MCS) involves the use of precise test artifacts:
- High-precision glass measurement plates: These serve as a substrate instead of real PCBs. Glass plates are manufactured with extremely tight tolerances, thereby eliminating PCB inaccuracies that could otherwise obscure the actual performance of the pick-and-place machine.
- “Dummy” components: “Dummy” components are used to simulate real electronic components during the machine capability study. The type depends on the design of the pick-and-place head to be tested. For heads designed for placing QFP components, glass dummies are ideal. These are free from manufacturing tolerances, deviations in lead coplanarity, or package dimensions, as found in real components. They often feature precisely etched fiducial marks for accurate post-placement measurements. For heads designed for rapid placement of chip components, either featureless jig components (without solder leads) or flawless real chip resistors are used.
- The Process: In this procedure, the pick-and-place machine picks up the dummy components and places them onto the glass plate according to a specially designed layout. This layout must be adapted to the specific configuration of the system under investigation to capture all typical influences of the system, such as the number of gantries, nozzles, placement angles, etc.
- The Measurement: After placement, the glass plate is removed from the system, and the positions of the components are measured in an external measurement system, such as the CmController.
The resulting data represent the actual mechanical and optical capabilities of the machine. This degree of isolation allows engineers to answer questions such as:
- “Is a particular pick-and-place head consistently less accurate than others?”
- “Does a specific nozzle show increased variability or drift over time?”
- “Are there systematic errors?”
- “What is the machine capability index for a specific component size?”
This in-depth understanding of machine-specific performance is the foundation for predictive maintenance, targeted calibration, and the optimization of machine performance.
Reflow Oven Analysis: Stability of Temperature Profiles
The reflow process primarily determines the quality of solder joints and not directly the position of placed components. Although these exhibit a certain “self-centering” due to the surface tension of the molten solder during the reflow process, it is important to understand its role.
- What is evaluated: The reflow process is primarily evaluated based on its thermal profile. This includes the measurement of preheat temperature, soak time, peak temperature, and, if applicable, heating and cooling rates. These parameters are crucial for good wetting, void prevention, minimizing thermal stress on components, and ensuring robust solder joints. Profiling is typically performed using thermocouples attached to a test board that passes through the oven.
- What this tells us (and what it doesn’t): While self-centering is an observable phenomenon, it should be regarded as a property of molten solder rather than a corrective mechanism for upstream positional deviations. Relying on reflow to “correct” poor or misaligned component placement by the pick-and-place machine is a fundamentally flawed process strategy. A correctly placed component with an accurately deposited solder paste leads to a robust joint. Attempting to compensate for positional errors during the reflow phase is likely to impair joint strength, cause potential short circuits or tombstoning, and indicates a lack of control in upstream process steps. The reflow oven’s task is to reliably convert the paste into strong solder joints under controlled thermal conditions, not to correct fundamental assembly inaccuracies.
Summary:
Through the consistent application of this decoupled, step-by-step analytical approach, SMT manufacturing gains access to clean, specific, and actionable datasets for each critical machine and process step. This detailed understanding is not merely an academic exercise but forms the indispensable foundation upon which powerful and precise statistical software modules can be built. Such modules enable predictive analyses for maintenance, root cause analyses for errors, and ultimately a significant improvement in product quality and manufacturing efficiency. This methodical approach ensures that process improvements are targeted, effective, and data-driven.

